Discover the essential steps and resources for installing Delta shower doors with our comprehensive guide. Learn how to transform your bathroom with easy-to-follow PDF instructions and expert tips.
1.1 Importance of Proper Installation

Proper installation of a Delta shower door is crucial for ensuring durability, functionality, and safety. A well-installed door prevents water leaks, enhances stability, and maintains the product’s warranty. Incorrect installation can lead to misalignment, water seepage, and potential safety hazards, such as glass breakage. Following the manufacturer’s instructions and using the correct materials ensures a flawless finish and long-lasting performance. Additionally, proper installation preserves the aesthetic appeal of the shower door, contributing to a modern and sleek bathroom design. Always refer to the official Delta shower door installation PDF guide for detailed steps and safety precautions to achieve a professional-grade result.
1.2 Overview of the Delta Shower Door System
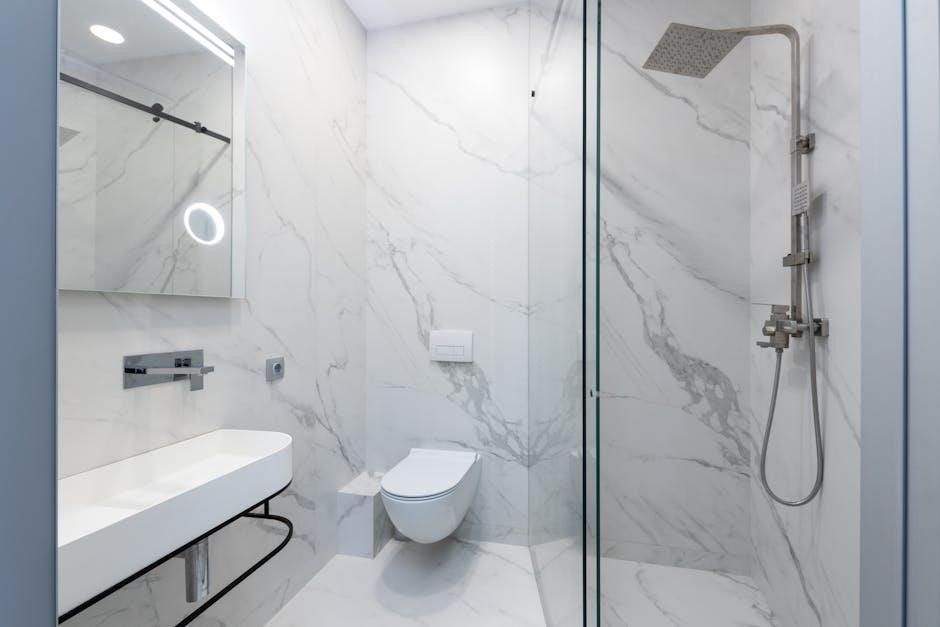
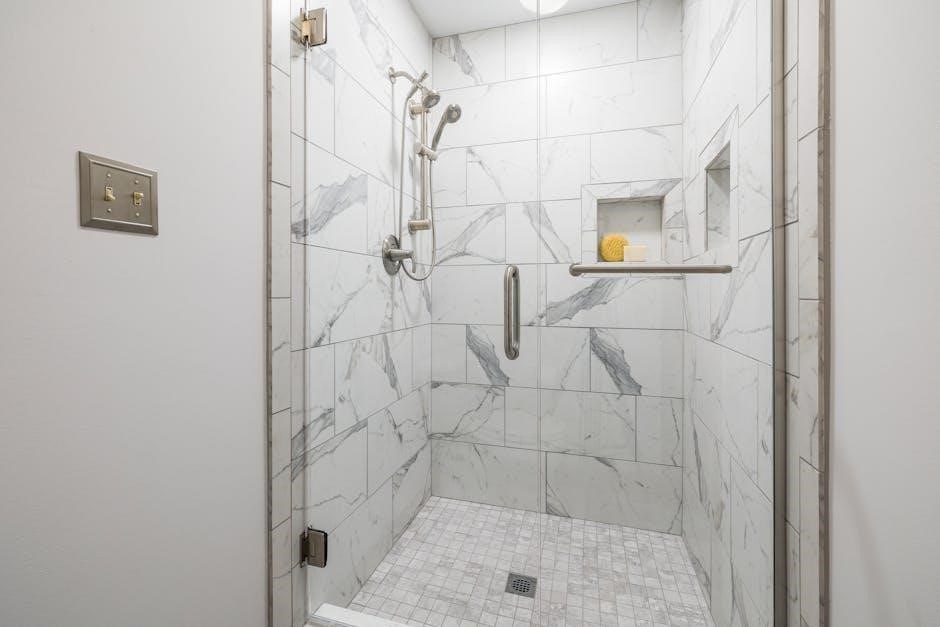
The Delta Shower Door System offers a blend of style, durability, and functionality, designed to elevate your bathroom experience. Available in various models, such as frameless sliding doors, pivot doors, and contemporary styles, the system caters to different bathroom aesthetics. Each model features high-quality materials, including 1/4-inch or 6mm tempered glass, ensuring strength and transparency. The doors are equipped with sleek handles and hardware designed for smooth operation. The system includes detailed installation instructions, hardware, and safety guidelines to ensure a secure and professional setup. Whether you’re aiming for a modern, minimalist look or a traditional design, Delta Shower Door Systems provide versatile options to enhance your bathroom’s appearance and functionality. Their commitment to quality and user-friendly installation makes them a popular choice for homeowners and professionals alike.
Preparation for Installation
Ensure a smooth installation by gathering tools, materials, and reviewing the manual. Follow safety precautions and organize components before starting the process.
2.1 Tools and Materials Needed
To ensure a successful installation, gather the necessary tools and materials beforehand. These include a measuring tape, level, drill, screwdriver, Allen wrench, silicone sealant, and adhesive tape. Additionally, have a pencil, safety glasses, and gloves for protection. For specific Delta shower door models, check the installation PDF for exact requirements. Organize all components from the shower door kit, such as frames, handles, hinges, and glass panels, and verify their completeness. Having a clean, dry workspace is crucial. Ensure all tools are within reach to streamline the process. Proper preparation prevents delays and ensures accuracy during installation. Refer to the Delta shower door installation instructions PDF for a detailed list tailored to your specific model.
2.2 Understanding the Installation Manual
The Delta shower door installation manual is your primary guide, ensuring a smooth and correct setup. It provides detailed diagrams, step-by-step instructions, and safety tips. Before starting, read the manual thoroughly to understand each part and its role. Familiarize yourself with the terminology and the sequence of tasks. Pay attention to warnings and recommendations to avoid common mistakes. The manual also includes troubleshooting tips for issues that may arise. Use the visual aids, such as diagrams, to better grasp the assembly process. By following the manual closely, you can ensure a professional-grade installation. If unsure about any step, consider consulting additional resources or contacting Delta support for clarification. Proper understanding of the manual is key to achieving a secure and functional shower door setup.
2.3 Safety Precautions

Ensuring safety is crucial during Delta shower door installation. Begin by clearing the work area of clutter to prevent tripping hazards. Wear protective gear, such as gloves and safety glasses, to safeguard against sharp edges or tool-related accidents. Always use a sturdy ladder or step stool and maintain three points of contact. Avoid overreaching, and consider having a second person assist for stability. Keep power tools away from water sources, and ensure the shower area is dry before starting. Follow all manufacturer guidelines for tool usage and material handling. Properly secure heavy components to prevent accidental falls. If unsure about any step, consult the manual or contact a professional. Prioritizing safety ensures a successful and injury-free installation process. Always adhere to Delta’s recommendations for a secure setup.

Step-by-Step Installation Process
Follow a structured approach: prepare the area, install the frame, attach glass panels, secure hardware, and complete final checks for alignment and stability.
3.1 Preparing the Shower Area
Before starting the installation, ensure the shower area is clean and dry. Remove any existing shower doors, handles, or accessories. Inspect the wall and floor surfaces for damage or unevenness. If necessary, repair cracks or level the surface. Clear the space of any obstructions, such as bathroom accessories or flooring coverings. Cover the floor and surrounding areas with protective materials like plastic or drop cloths to prevent damage from debris. Ensure the shower area is completely dry, as moisture can interfere with adhesive or sealing processes. Double-check that all necessary tools and materials are within reach. Proper preparation ensures a smooth and efficient installation process.
3.2 Installing the Door Frame
Begin by ensuring the wall surfaces are level and clean. Peel the backing from the vinyl wall strips included in the Delta kit and press them firmly onto the wall where the frame will be installed. These strips provide a smooth, water-resistant surface for the frame. Align the vertical frame pieces with the marks made during preparation and attach them using the provided screws. Double-check the vertical alignment using a level tool. Tighten all screws securely but avoid overtightening, which may damage the wall or frame. Once the vertical pieces are in place, attach the horizontal frame components, ensuring they fit snugly. Refer to the installation manual for specific alignment instructions. Allow the frame to set for a few minutes before proceeding to the next step.
3.3 Attaching the Glass Panels
Begin by carefully lifting the glass panels using a suction cup to avoid damage or breakage. Align the glass panel with the door frame, ensuring the pre-drilled holes match the hinges. Insert the screws into the holes and tighten them gently to secure the panel without overtightening. Repeat this process for the second panel, maintaining alignment for proper fit. Once both panels are in place, apply clear silicone sealant around the edges to prevent water seepage. Double-check that all hardware, such as hinges and handles, is correctly positioned before finalizing. Finally, test the door’s movement and alignment to ensure smooth operation and a watertight seal.
3.4 Securing the Handles and Hardware
Once the glass panels are securely attached, focus on installing the handles and hardware. Use a hex wrench or screwdriver to position the handle on the exterior side of the door, aligning it with the pre-drilled screw holes. Insert the provided screws and tighten them firmly, ensuring the handle is stable. Repeat the process for the interior handle, if applicable. Apply a small amount of silicone sealant around the base of the handles to prevent water penetration; For additional hardware, such as towel bars or hinges, follow the manufacturer’s instructions for proper placement and tightening. Double-check all components to ensure they are securely fastened and evenly aligned. Test the door’s opening and closing mechanism to confirm smooth operation and proper functionality of the installed hardware.
3;5 Final Adjustments and Alignment
After installing all components, perform final adjustments to ensure proper alignment and functionality. Check the door’s vertical and horizontal alignment with the frame, making sure it is even and plumb. Use shims or adjustment screws to align the hinges and rollers, ensuring smooth operation. Tighten all screws and bolts to secure the frame and hardware. Inspect the glass panels for proper fit and alignment within the frame. Apply additional silicone sealant if necessary to ensure a watertight seal. Double-check all moving parts, such as hinges and rollers, for smooth operation. Test the door by opening and closing it multiple times to ensure it glides effortlessly and remains aligned. Make any necessary fine-tune adjustments to achieve a perfect fit and functionality.
Troubleshooting Common Issues
Identify and address common problems like misalignment, leaks, or hardware malfunctions. Refer to the Delta installation manual for diagnostic guidance and step-by-step solutions to ensure optimal functionality.
4.1 Addressing Misalignment Problems
Misalignment issues with Delta shower doors can hinder proper functioning and lead to leaks or difficulty in closing. Start by checking if the door frame is level and plumb, as uneven installation is a common cause. Adjust the hinges or rollers to ensure the door aligns correctly with the frame. If the issue persists, inspect the wall anchors or floor brackets for looseness and tighten them as needed. For sliding doors, ensure the track is clean and free of debris. Refer to the Delta shower door installation instructions PDF for specific adjustment guidelines. Regularly lubricating moving parts can also help maintain smooth operation and prevent misalignment over time. Always consult the manual for model-specific troubleshooting steps.
4.2 Fixing Leaks and Water Seepage
Leaks and water seepage are common issues that can arise after Delta shower door installation. To address this, inspect the door’s perimeter for gaps in the seals or gaskets. Reapply silicone sealant around the edges if necessary. Ensure the door is properly aligned with the frame, as misalignment can cause water to escape. Check the hinges and rollers for tightness, as loose components can disrupt the door’s sealing ability. If the leak persists, replace worn-out gaskets or seals with genuine Delta parts. Regularly cleaning the door track and ensuring proper drainage can also prevent water accumulation. Refer to the Delta shower door installation instructions PDF for detailed steps on sealing and maintaining your specific model. Addressing leaks promptly will help maintain the door’s functionality and prevent water damage. Always use Delta-recommended materials for optimal results.
4.3 Replacing Damaged or Worn-Out Parts
Replacing damaged or worn-out parts is essential to maintain the functionality and appearance of your Delta shower door. Start by identifying the faulty component, such as hinges, rollers, or seals. Use an Allen wrench or screwdriver to remove the door from the frame for easier access. Order genuine Delta replacement parts from the manufacturer or authorized dealers to ensure compatibility. Follow the Delta shower door installation instructions PDF for specific removal and installation steps. Apply a small amount of silicone lubricant to moving parts to ensure smooth operation. After replacing the parts, reattach the door and test its alignment and movement. Regular inspections can help prevent further damage and extend the lifespan of your shower door. Always refer to the user manual for guidance tailored to your model.

Maintenance and Care Tips
Regular maintenance ensures your Delta shower door remains functional and aesthetically pleasing. Clean the door with mild soap and water, and use a squeegee to prevent water spots. Lubricate hinges and rollers periodically to maintain smooth operation. Inspect seals and gaskets for wear and tear, replacing them as needed to prevent leaks.
5.1 Cleaning the Shower Door and Handles
Cleaning your Delta shower door and handles regularly prevents soap scum buildup and ensures a pristine appearance. Use a mild glass cleaner or a mixture of water and white vinegar. Avoid abrasive chemicals or scrubbers, as they may scratch the glass or damage the finish. For the handles, wipe them down with a soft cloth dampened with soap and water. Dry the door thoroughly after cleaning to prevent water spots. Regular cleaning also helps maintain the door’s functionality and extends its lifespan. For tougher stains, let the cleaning solution sit for a few minutes before wiping clean. Always rinse and dry the door to maintain its clarity and shine.
5.2 Lubricating Moving Parts
Lubricating the moving parts of your Delta shower door ensures smooth operation and prevents wear. Use a silicone-based spray or white lithium grease on hinges, rollers, and door tracks. Apply a small amount to the moving components, then wipe off any excess with a dry cloth. This prevents dust and grime from accumulating and causing friction. Lubricate every 6 months or when you notice squeaking or stiffness. For handle screws or other adjustable parts, a light application of grease will maintain ease of use. Regular lubrication extends the lifespan of the door’s mechanisms and keeps it functioning like new. Avoid using oil-based products, as they can attract dirt. Proper maintenance ensures the door glides smoothly and remains durable over time.
5.3 Inspecting for Wear and Tear
Regularly inspecting your Delta shower door for wear and tear is essential to maintain its functionality and appearance. Check the hinges, rollers, and seals for signs of damage, rust, or mineral buildup. Look for cracks in the glass panels or frame, and ensure the door aligns properly when closed. Inspect the handles and locks for looseness or difficulty in latching. Replace any worn-out or damaged parts promptly to prevent further issues. Clean the tracks and rollers to remove dirt or debris that may cause friction. Inspect the door sweep or threshold seal for wear, as it prevents water leakage. Perform these checks every 3 to 6 months to ensure optimal performance. Addressing minor issues early can prevent major repairs and extend the lifespan of your shower door.
Specific Models and Their Installation Requirements
Delta shower door models vary in design, requiring tailored installation approaches. Frameless doors need precise measurements, while hinged models demand secure wall anchors. Refer to the manual for model-specific guidance to ensure proper alignment and fitting, guaranteeing long-term functionality and safety.
6.1 Delta Frameless Sliding Shower Door
The Delta Frameless Sliding Shower Door offers a sleek, modern design with smooth operation. Installation requires precise measurements to ensure proper alignment of the sliding mechanism. The frameless design eliminates the need for a traditional frame, relying instead on sturdy glass panels and secure hardware. Wall anchors must be installed correctly to support the door’s weight. Ensure the track is level and properly sealed to prevent water leakage. Follow the Delta installation manual for specific torque settings and hardware placement. Use shims if necessary for alignment. Apply silicone sealant around edges for a watertight finish. Double-check all connections before finalizing to ensure smooth sliding functionality and durability. Proper installation ensures a leak-free, stylish shower enclosure. Refer to the Delta shower door installation PDF for detailed guidance specific to this model.

6.2 Delta Kesara SD7909764 Installation
The Delta Kesara SD7909764 shower door is known for its sleek design and smooth functionality. Installation requires careful preparation, starting with measuring the shower opening to ensure a perfect fit. The door’s frameless design demands precise alignment of the hinges and rollers. Use the provided wall anchors to secure the hinges firmly. Apply silicone sealant around the edges to prevent water leakage. Follow the Delta installation manual for torque specifications to avoid over-tightening. Ensure the rollers are properly seated in the track for smooth sliding. Double-check the door’s alignment before finalizing. Regular lubrication of the rollers is recommended for maintenance. Refer to the Delta shower door installation PDF for model-specific instructions and troubleshooting tips. Proper installation ensures long-lasting performance and a leak-free shower experience.
6.3 Delta Contemporary Style Shower Door
The Delta Contemporary Style Shower Door offers a modern, sleek appearance with clean lines and minimalist aesthetics. Its installation requires precise measurement of the shower enclosure to ensure a seamless fit. Begin by preparing the wall and floor surfaces, ensuring they are level and clean. Use the provided rubber gaskets and silicone sealant to create a watertight seal. Align the door frame with the shower opening, securing it with wall brackets. Tighten the screws gradually to avoid warping the frame. Install the glass panels by attaching them to the hinges, ensuring smooth operation. Apply a bead of silicone sealant around the edges for added waterproofing. Test the door’s movement and adjust the hinges if necessary. Refer to the Delta shower door installation PDF for specific torque specifications and alignment tips. Proper installation ensures a durable and leak-free contemporary shower door system. Always follow safety guidelines and manufacturer recommendations for optimal results. Regular maintenance, such as cleaning and lubricating hinges, will extend the door’s lifespan. For additional support, consult Delta’s customer care or online resources for troubleshooting and repair guidance.
Additional Resources and Support
Access the Delta shower door installation PDF online for detailed guidance. Contact Delta customer support for troubleshooting. Watch video tutorials for step-by-step installation help.
7.1 Downloading the Delta Shower Door Installation PDF
To download the Delta shower door installation instructions PDF, visit the official Delta Faucet website. Navigate to the “Support” or “Resources” section, where you can search for your specific shower door model. Enter the model number, such as the Delta Kesara SD7909764, to find the corresponding guide. The PDF will provide detailed step-by-step instructions, diagrams, and essential safety tips. Ensure your device has a PDF reader installed to view the document. For convenience, save the file to your computer or mobile device for easy access during installation. If you cannot find the PDF online, contact Delta customer support for assistance. This resource is invaluable for a smooth and successful installation process.
7.2 Contacting Delta Customer Care
If you need assistance with your Delta shower door installation, reaching out to Delta Customer Care is a reliable option. Visit the official Delta Faucet website and locate the “Contact Us” section. Here, you can find the customer service phone number, email address, or live chat option. Provide details about your shower door model, such as the Delta Kesara SD7909764, to receive tailored support. Representatives are available to answer installation-related questions, clarify instructions, or address any concerns. Be sure to have your model number and a detailed description of the issue ready to ensure a prompt resolution. Delta Customer Care is committed to helping you achieve a successful and stress-free installation experience.
7.3 Online Tutorials and Video Guides
For a visual and hands-on approach, Delta offers online tutorials and video guides to help with shower door installation. Visit the official Delta Faucet website and navigate to the “Support” or “Resources” section, where you can find installation videos tailored to specific models, such as the Delta Kesara SD7909764. YouTube is another excellent platform, where Delta often posts step-by-step guides. These videos provide clear demonstrations of the installation process, from preparing the shower area to securing hardware. Additionally, community forums and DIY websites may feature user-generated tutorials, offering practical tips and troubleshooting advice. Utilizing these resources ensures a smoother installation process and helps address any challenges you may encounter.